Culminating Project - Character Modelling Program: Blender 2.76b Hand In: .blend file, rendered .png Due Date: Friday, June 17th |
In this series of tutorials, you will learn how to create a manifold, watertight character model using the extrude tool (in edit mode) and mirror modifier (in object mode). After, you will customize the base you've created to put your own personal spin on your character! |
Everything you need for this assignment will be found in the Shared Drive, in a folder called "CharacterModelling_Tut&Assignment" |
Welcome to 3D Modeling 35S
Course Assignments & Activities
Assignments will be added to the table below as they are introduced in class. Any useful links, handouts, or additional information will be provided in the form of a hyperlink :)
Download & Hand-In Instructions:
To download a document from the class website, simply click on it (download, or, hyperlinks, will appear in blue). Always choose "Save File" and make sure that the box that preserves the document's current formatting is checked off. If the file automatically opens, close it. Now, navigate to your Downloads folder, CUT the document from this folder, and paste it into the appropriate folder within your Student Drive. Title each document you download/hand in as follows: “loginname_assignmenttitle” (ex. hambri_AnticipationGuide). Open the document from your folder, then use the document to complete your assignment. Once you're finished, hand it in by COPYing the document and pasting it (don't just drag and drop - it can cause major issues with your work) into Ms. Hammond's Hand In folder.
ASSIGNMENT/ACTIVITY |
DESCRIPTION |
RESOURCES |
10) Household Object Assignment Program: Blender Hand-In: "loginname_HHObject" folder (inside folder: assignment handout, .blend, rendered image, all texture images associated with your model) |
STEP 1 Prior to creating your model, you will use the Assignment handout to create a plan for this project. You will then partner up with a classmate and have him/her assess your plan. STEP 2 You will create a household object that is at a level of complexity equal to or greater than the Coffee Cup and the Alarm Clock tutorials. This object must be created in Edit Mode (though you may use primitive mesh objects as your foundation). It must also have materials (try applying image textures through UV mapping) and be rendered using the Cycles render. STEP 3 After completing your model, you will use the Assignment handout to reflect on your project. You will then partner up with the same classmate from STEP 1 and have him/her assess your final product. |
Tips & Tools Handout |
After completing the the previous tutorials, you have learned MUCH about Edit Mode... but there is still much, much more to learn when it comes to building your own model. While this course aims to scratch only the surface of Blender's possibilities, this Tips & Tools handout will provide you with a breakdown of some of the most essential skills and tools you will need when it comes to completing the Household Object assignment. |
9) Alarm Clock Tutorial Program: Blender Hand-In: loginname_alarmclock folder (inside folder: .blend, .png) Due: Thursday, Jan. 12 |
This tutorial will build upon the basics of working in Blender's Edit Mode, and introduce you to the concept of UV Mapping. Over the next two classes you will be following along with one the very same tutorialist from the Coffee Cup tutorial to model and render (using the Cycles rendering engine) a 3D alarm clock. To do this successfully, I success splitting your screen (YouTube/Blender) and setting YouTube to "Theatre Mode." You will find the video links, as well as your notes and questions for this assignment in the resources section! |
8) Coffee Cup Tutorial Program: Blender Hand-In: loginname_cup folder (inside folder: .blend, .png) Due: Wednesday, Jan. 11 |
This tutorial will introduce you to the basics of working in Blender's Edit Mode, as well as refresh your memory about basic navigation and transformation! Over the next two classes you will be following along with one of my favorite tutorialists to model and render (using the Cycles rendering engine) a 3D coffee cup. To do this successfully, I success splitting your screen (YouTube/Blender) and setting YouTube to "Theatre Mode." You will find the video links, as well as your notes and questions for this assignment in the resources section! |
BONUS ASSIGNMENT 7) 3D Christmas Card Program: Blender Hand-In: loginname_christmas.blend (inside folder: .blend, .png) Due: Thursday, December 22nd |
Once you've learned how to create some text, combine these skills with the skills you've gained from the last project and create a 3D Christmas card, which will be rendered and printed! Make sure that when you Render, you have "Cycles" selected. If you plan on simply using your render as your desktop background, under the Render Options (the little camera in the Properties panel), set your Dimension > Resolution to:
|
3D Text Tutorial Video Assignment Requirements
|
6) Blender: Primitive Mesh Model Program: Blender Hand-In: loginname_primitiveobject.blend (inside folder: proposal, .blend, .png) Due: Wednesday, December 21st |
You've managed to make a simple robot by using only Blender's object mode, primitive mesh objects, transformation tools, and very cringily narrated tutorial... now its time to apply those skills - the cringy tutorial + your imagination to create your very own Primitive Mesh Object. It can be WHATEVER you want (animal, spaceship, super-robot, building, vehicle, bouquet, computer, etc. etc. etc.). Your only restrictions are:
Follow the same modeling process you did when creating your simple robot (Model, Apply Materials, Set the Scene, Render) |
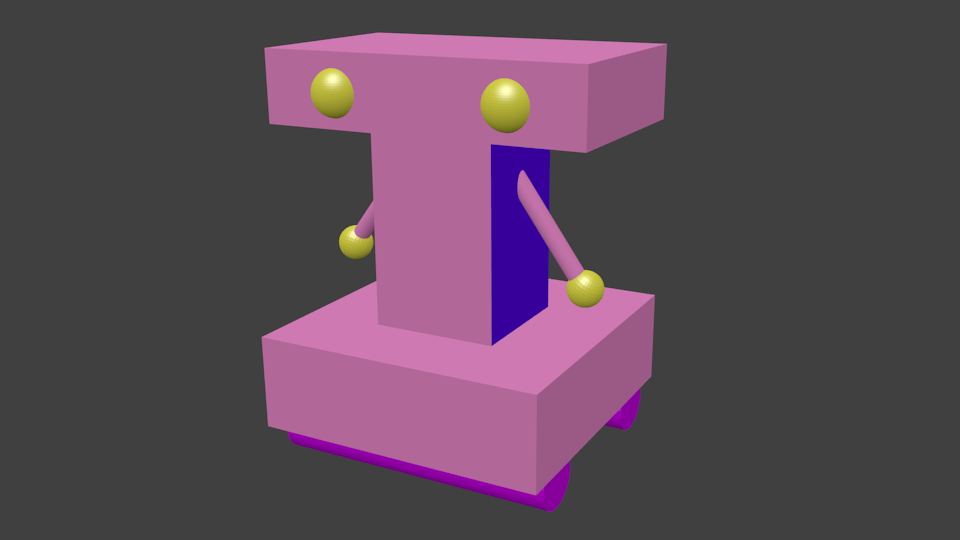
5) Intro Blender: Simple Robot Program: Blender Hand-In: loginname_robot.blend Due: Thursday, Dec 15th |
So, now that you know the basics of 3D modeling, let's apply this knowledge to an actual 3D modeling program - Blender! In this section of the course, I (and a few others in the form of tutorial videos) will walk you through the basics of Blender's layout, navigation, and transformation. Then, together, we will model a simple robot. Once your robot has been assembled, I will walk you through the complete modeling process:
|
4) Intro to 3D Scavenger Hunt: Part 2 Program: Word Hand-In: 3DScavHunt-Part2 Due: Wednesday, Dec 14 |
Now that you've gotten a chance to test the 3D waters using SketchUp, we are going to dive in to the REAL world of 3D modeling using a free open-source program called Blender. Use documents in the Shared folder, as well as online resources, to respond to the questions inside the Scavenger Hunt document. Please use a different font colour than black (colour of questions). |
3) Tiny Dream Home Assignment Program: Graph Paper, Word, SketchUp Pro 2015 Hand-In: Floor Plan, .skp, .png x4, Preflection Floor Plan Due: Thursday, Nov 24 Preflection Due: Friday, Nov 25 .skp Model Due: Monday, Dec 12 |
Apply your SketchUp skills by creating a small, yet visually intriguing, tiny house complete with structure, materials, furniture, and landscaping! |
2) Getting Started with SketchUp Program: Google SketchUp Hand In: Nada Due Date: Tuesday, Nov. 22nd |
Prior to taking on your first 3D Modeling projectin SketchUp, you've got to learn the basics! Follow along with the video tutorials in Ms. Hammond's Hand Out folder to get started with SketchUp! |
1) Intro to 3D Scavenger Hunt: Part 1 Program: Word Hand In: login_3DScavHunt-Part1 Due Date: Wednesday, Nov. 16th |
Before you begin creating your own animations, it is important that you understand where animation came from, and how it has evolved over time... so that you know what you're getting yourself into! Use the presentation we watched in class, as well as online resources, to respond to the questions inside the Scavenger Hunt document. Please use a different font colour than black (colour of questions). |
Course Resources
|
Free, Copyright-Free Audio
Sound Bible (sound effects) YouTube Audio Library (independent music and sound effects) Bensound (independent music) Free Music Archive (independent music) Online Image Editors
Picmonkey (photo editing site) PixlrExpress (photo editing site) BeFunky (photo editing site) |
Copyright-Free Photos & Graphics
Creative Commons (copyright-free images, audio & video) Morgue File (use the free search option) Pexels (high-quality stock images) Albumarium (high-quality stock images) Free Pik (vector images, photographs, PSD files, and more) Open ClipArt Gallery (free clipart graphics) Clkr Clipart Gallery (free clipart by the people for the people) Classroom Clipart (free clipart for school use) The Noun Project (icons for just about anything) Giphy (shareable memes and GIFs) |
